Wednesday, December 21, 2011

Peppermint Bark

Peppermint Bark is one of my favorite Christmas snacks. So I'm going to share with you how my family makes it.
you will need
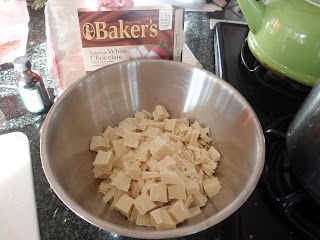
17 oz white chocolate (we like to use Baker's brand) chopped up

6 oz or around 30 red and white striped hard peppermint candies (the better quality ones taste best) coarsely crushed
7 oz bittersweet or semisweet chocolate, chopped (we use Baker's brand)
6 T whipping cream
3/4 tsp peppermint extract
Start by wrapping a cookie sheet in foil and then mark a 12x9" rectangle on the foil. Next take the metal bowl and put it on top of a sauce pan with boiling water turned down to med-low. Then you stir the chocolate till its melted. Once its melted take 2/3 c and spread evenly in the rectangle that you drew on your foil. then right away sprinkle 1/4 c of the crushed peppermint candies over the chocolate. It should look like the picture below.
Chill 15 min.
Now set aside the remaining white chocolate. and in another metal bowl or the top part of a double boiler melt the semisweet or bittersweet chocolate with the heavy cream and peppermint extract.
once that is melted take the chilled 1st layer out so you can spread the chocolate evenly on top of the candies. It should look like the picture below.
This will now need to be chilled about 25 min or until cold and firm
Put the white chocolate back on the pot of water to re-melt it. Once the first two layers are chilled spread the rest of the melted white chocolate on top, and then add the peppermint candies right away and then chill for another 20 minutes or until firm. It should look like the picture below.
Once it is chilled you need to carefully remove the foil and set the peppermint bark on a cutting surface. If you want a professional look cut off the edges so they are nice and strait. Next cut bark crosswise into 2'' wide strips.
Cut each strip into 3 sections or more if you prefer.
Then cut those sections diagonally into triangles.
store in the fridge for up to 2 weeks and enjoy.
If you try this let me know what you think.

Sunday, December 18, 2011

Love Cocoon

This is the 1st baby cocoon I have made but I love it so much I think I'm going to need to make more.
 I found the pattern on Ravelry its a knitting and crochet site and you can find just about any pattern you want on there.
I am using Natalie's bitty baby for the pictures since my little guy isn't born yet.


This will look better on a real baby because real babies don't have hard plastic arms and legs.
The yarn I used is Malabrigo worsted yarn (its wool from a Marino sheep very soft and warm. If you didn't know wool is also fire retardant so very safe for babies. On the down side this yarn is hand wash only and so is most wool), color Marron Oscuro
and I used size 13 needles and knit in the round.
This pattern is for new born babies.
I started by casting on 40 stitches and knitting in the round till I had it 14'' long
and for the decrease sequence
R1: *K8, K2tog, repeat around from* (36 stitches remain)
R2: K all stitches
R3: *K7, K2tog, repeat around from* (32 stitches remain)
R4: K all stitches
R5: *K6, K2tog, repeat around from* (28 stitches remain)
R6: *K5, K2tog, repeat around from* (24 stitches remain)
R7: *K4, K2tog, repeat around from* (20 stitches remain)
R8: *K3, K2tog, repeat around from* (16 stitches remain)
R9: *K2, K2tog, repeat around from* (12 stitches remain)
R10: K all stitches
R11: K2tog around (6 stitches remain)
R12: cut 6” tail to weave through eight remaining stitches.


the link to the official pattern for the laurel love cocoon  
The link has a picture of a real baby in the cocoon. Its just so very cute! 
Not to mention a very fast easy project.
If you are having a baby or know someone who is having a baby you should make this or have someone like me make it for a small fee. 
If you have any Questions about the project or want me to teach you to knit just ask. I love to help with knitting and also teaching how to knit.

Roast Chicken Dinner

The Recipe that I used is from my new cook book Forgotten Skills of cooking by Dariana Allen. The recipe called for a 4 1/2lb chicken but we had almost 6 lb chicken from Jeff's parents farm so we used that. The chicken just took a little longer to cook. The recipe also called for stuffing but I didn't use there recipe I used my grandma's stuffing recipe and it was fantastic.
Recipe:
Preheat oven to 350 
weigh the chicken and calculate 20 min per pound and 20 minutes for cooking.
remove the wishbone from the neck for easy carving later (optional) and tuck the wing points underneath the chicken to make a neat shape. 
set aside while making the stuffing.
Stuffing- for a 4 lb bird 
4 cups dried bread crumbs 
melt 1/3 cup fat (butter if you don't have fat) in a skillet 
add 1/4 cup finely minced onion and cook until yellow
stir in some bread crumbs and heat, stirring to prevent excessive browning 
turn into a deep bowl and mix in lightly 
1/2 cup chopped celery
2 tsp. salt, 1/4 tsp pepper, 1 tsp poultry seasoning
remaining bread crumbs and a little water
now fill the bird with the stuffing that you have made and season the outside of the chicken with butter, salt and freshly ground black pepper.
cook the chicken to your calculated time .  While the chicken is cooking baste it a few times with the juices from the chicken in your roasting pan. To test if its done, prick the thickest part at the base of the thigh and examen the juices: there should be no trace of pink when its done.


We made Mashed potatoes to go with the chicken and stuffing, and Jeff also made some gravy. Not a very colorful but it sure did taste good especially the stuffing!


Sunday, December 11, 2011

Paper Ornament Tutorial

I saw this on Etsy and said I can make it. And guess what? I did! So I am going to share with you how I made the paper ornament from start to finish.
What I used for the project was my paper cutter (it has a ruler on it), double sided tape, regular tape and paper. I used tape because I do not have a stapler so I was just using what I had on hand. But if you have a stapler you can use that instead of tape and if you don't have a paper cutter you will need a scissors and a ruler.
I started by Cutting the paper in to 1 inch strips
And once I had the one inch strips I could cut them to the sizes I needed. You can use just about any sizes you want but I will tell you the sizes that I use for this project. I had one 5 inch strip, two 6 inch strips, two 7 inch strips and two 8 inch strips. so each set of strips is one inch longer then the one before it.
This next step I took the 5 inch strip and put double sided tape on both side of one end. Then I took the 6 inch strips and matched up the ends so they stuck on the tape.
You do that till all of them are attached on the same end. With the smallest piece in the middle and the longest on the outside.

Once you have the one end all even and put together smallest in the middle growing to longest on the outside you can staple them together or wrap a piece of tape around at the end this keeps it from coming apart. Now we do the same thing on the other side. Putting double sided tape on both sides of the ends of the 5 inch long strip of paper. Once you have the tape on you can take the 6 inch long paper and match them up on the tape so they are stuck together. Once this is done it will start to take shape.
Next you put the double sided tape on the outside of the 6 inch strips so you can stick the 7 inch strips to the 6 inch strips. You do that one more time by putting tape on the outside of the seven inch strips and the sticking the 8 inch strips to them making sure as you do this that all of the ends are matching up.
Now that you are done all you have left is to tape or staple the ends of this side. Then add string so you can hang it up. I'm going to hang mine in my picture window, but they can be hung from the Christmas tree or from the ceiling. They can also be made in different sizes.
    I hope you have enjoyed my very first Tutorial. If you have any questions just ask.

Friday, December 9, 2011

Chocolate Cake

     We are having a birthday dinner for my dad tonight and my mom made this chocolate cake for him. I have also made this cake a few times and it is the best chocolate cake I have ever had. On the recipe it says "If you could only have one recipe for chocolate cake, this would be the one."  I agree with whoever wrote that. The picture of the cake is one that I made for Jeff for his 30th birthday last January.
    I'm not going to type out the recipe but I will give you guys a link so when you feel like making the best chocolate cake ever (that is if you like chocolate cake) you can. Scharffen berger chocolate cake
     I will eventually post something not related to food but for now this is what my brain is focused on. I have some knitting projects and some crafts that I need to take pictures of and get on-line so keep checking to see if I have posted anything. 

Thursday, December 8, 2011

Warm Apple Cider

      Its a cold night in Minnesota and what better way to warm up then with some Spiced Cider. This also happens to be my very 1st blog posting EVER!!! I'm very excited to finally be starting up my blog.


        This is my Mom's Recipe:

1 Large Orange                                                     Makes 16 cups
12 Whole Cloves                                                    Cook 15 Min
1 Medium- Sized Lemmon
1 Gallon Apple Cider
6 3 inch- long Cinnamon Sticks


1. Cut two 1/2- inch thick slices from the center of the orange. Then Stick the whole cloves into the skin around each orange slice. Next remove a 1- inch- wide continuous strip of peel from lemon

2. In a 5- quart sauce pot over High heat, heat Orange slices with Cloves, Lemon peel, Apple Cider and Cinnamon sticks to boiling. Reduce heat to low; cover and simmer for 15 min

3. Pour Hot Cider into large heat- safe Punch bowl (about 5 quarts) and serve

This recipe can easily cut in half . Enjoy